text only tutorial (no pictures) :
Make your own scented candles
I propose you this tutorial to make your own "pillar" candles, scented, coloured outside AND inside (candles called "dyed in the mass").
Be proud of yourselves and the quality candles you will make with love to honour our Gods!
I think this is a wonderful present for Yule, to tell them how much we love them !
Just follow this step-by-step and make according to your taste and imagination.
MAKING MATERIALS
You will need :
- Polycarbonate and/or silicone and/or metal moulds
(plastic or latex moulds should be avoided as they are too fragile and quickly become unusable).
Here are the moulds I use: Silicone mould to make candles in the shape of Apples and Roses, polycarbonate "votive candle" moulds to make small cylindrical candles (diameter 4cm 1,57 in / Height 5.2cm 2,05 in), a larger cylindrical mould (diameter 5cm 1,97 in / Height 10 cm 3,94 in), round polycarbonate mould to make ball candles of 7cm 2,76 in diameter,
My Apple and Rose candles have the particularity of being phosphorescent candles!
It's a sentence of Thot which gave me the idea ! "From darkness comes light".
A multitude of moulds exist: cylindrical, rectangular, cone-shaped, pyramid-shaped, egg-shaped, etc.
- A cooking source (electric or gas hob) + an (old) pan + either another smaller pan or a metal jug that will fit into the first pan:
the wax for the candles should ALWAYS melt in a "bain-marie". Never melt the wax directly in a container in contact with the cooking source (because of the "melting point" and "flash point": avoid fires!)
- Metal wick holders (see photo below) to centre and hold the wick straight during pouring and drying:
If your wick is not centred correctly, the candle will only burn on one side and will quickly become unusable. Of course, you should not be obsessed with centring to the nearest millimetre, but a successful candle is above all a candle that burns evenly. This means that the size of the wick must be adapted to the circumference of the candle AND the wick must be well centred. Wick holders are not very expensive and are therefore essential!
- Wooden sticks (like skewers), to mix wax, dyes and fragrance.
- A kitchen scale and, if you have one, also a precision scale (to weigh the perfume and dyes)
- Plastic pipettes that will be used to take the perfume(s) and to measure the weight of the perfume in absence of a precision scale.
Very useful but may be optional for those who do not make candles regularly: the liquid thermometer.
On the other hand, and we will come back to this, in the absence of a thermometer, you will have to take precautions when adding the perfume: you have to be careful with the "flash point", or the temperature above which the perfumes ignite!
MATERIALS
- THE WAX
Candles are either made with paraffin wax (petroleum-based wax) or with vegetable wax.
BEWARE: with vegetable waxes, you will ONLY get pastel colours, unfortunately.
This is a pity because the texture of vegetable waxes is far superior to that of paraffin wax, the black fumes are much less, the combustion lasts longer (lower melting point) etc... Thus, a bright red dye will give a pink-red colour in vegetable wax, a bright blue dye will give a sky-blue colour etc.
Only paraffin will allow you to obtain a royal blue, a bright red, a "black" black and not a grey (and it will be difficult even with paraffin to obtain a deep black...).
For moulded candles/pillars you should only use either paraffin or palm wax/crystallised palm wax, because waxes must be hard.
Do not use soy wax, rapeseed wax or sunflower wax: they are suitable for making cast/pot candles, as they are very greasy and soft: their use in pots is ideal as the wax must literally stick to the surfaces of the container.
The melting point (temperature at which the wax becomes liquid) is 60°C for paraffin (140°F) and 50°c (122°F) for palm wax.
- THE WICKS
They must be made of pure cotton.
Flat wicks are suitable for paraffin wax, round wicks are suitable for vegetable waxes. But, I have personally tested: both work equally well in paraffin and palm wax without any problem. So, do your best.
It's not necessary to buy wicks with a "paper core" or a "core with metal filaments" (they are suitable for jar candles).
The diameter of the wick is important: if it is too small, the candle will not burn evenly, if it is too large, the candle will burn too quickly...
The rule: The diameter of the wick is related to the diameter of the final candle.
To cut the wick to the right length: height of the mould + 2 cm/ 0,8 in
- THE DYES AND COLOURINGS
The dyes should be granular or in small slabs. Powdered dyes/pigments only colour the surface of the candle. Only granular or slab dyes contain strong pigments that will colour the wax inside and out.
Approximately 3g / 0,11 oz of dye is needed for a 150-180 gram (5,3 – 6,4 oz) candle.
Be careful not to use too much, otherwise the wick will choke during combustion! But if you don't use enough, the final colour will be pale...
- PERFUMS
You should only use perfumes made for candles or, in a pinch, essential oils.
Be careful with essential oils because they have an extremely low "flash point": you have to wait several minutes for the wax to cool down before adding the essential oil to the wax, because they ignite easily!
When I use essential oils (example: to make candles with citronella essential oil in the summer against mosquitoes), I add "perfumers' oil", "isopropyl myristate", because this oil increases the flash point of essential oils.
The perfumes I use in my candles are made in Grasse, it is the French capital of Perfume, there are many distilleries.
The fragrances I use for ritual candles are most often: Oud wood (I love it), Sandalwood, Incense, Nag Champa, Rose, Jasmine, Spicy Orange, etc...
There is a very large choice of fragrances! Indulge yourself! But choose a quality perfume.
The weight (not the volume) of the perfume for moulded candles should be between 5 and 10% of the wax weight (jar candles tolerate a higher percentage of perfume: between 10 and 15% of the wax weight)
Indicative calculations to make your life easier
(but which will work without having to take your head off! - because I've done a lot of tests, so I might as well save you time and give you the formulas that work)
* Wick diameters
Don't forget: flat wick for paraffin, round wick for vegetable wax, but both will still work in either wax, it just won't work as well as it should. Do your best!
For a 4 cm / 1,57 in diameter candle: Take a size n°3
If you are colouring the candle and/or perfuming it, you will need to add a size above or even 2 sizes above.
To sum up, for a candle with a diameter of 4 cm 1,57 in , coloured AND perfumed, the wick should be size 4 (or 5, but this will generally be a little too large).
For a 5 cm / 1,97 in diameter candle: Take a n°4
If the candle is coloured and/or scented, you should take a size 5 (or 6, but this may be too much)
* Indicative final weight of the candles and weight of the perfume
A votive candle is about 60-65 grams / 2,12- 2,30 oz
Perfume dosed at 10% = 6 to 6.5 grams / 0,22 oz
A cylindrical pillar candle with a diameter of 5cm 1,97 in and a height of 10 cm/ 3,94 in is about 180 grams / 6,35 oz
10% fragrance = 18 grams / 0,64 oz
STEPS
1) Weigh the wax and dyes
2) Melt the wax in a "bain-marie
Fill the larger pan one third full of water. Pour the wax into the smaller pan (or metal pitcher). Allow 10-15 minutes for the wax to melt completely.
3) Cut and wax the wicks
Remember: measure the height of the mould + 2cm / 0,80 in = total length of the wick.
Then put the wicks in the liquid wax, leave them in for 2 minutes until the wax replaces any air bubbles in the cotton.
Remove the wicks from the wax with gloves, pull on both ends so that the wicks harden as straight as possible and let dry for a few minutes.
4) Add the dye to the melting wax
5) Place the wicks in the moulds until the pigments have mixed well with the wax
Pay attention to the final direction of the candle! Especially when you cut the wicks!
Example: in my large cylindrical mould, the top of the final candle is at the bottom. In the small moulds, the top of the candle is at the top.
There is no need to add a metal support at the end of the wick in the large cylindrical mould.
However, in the small cylindrical moulds this support is essential to "weight" the wick during the drying process so that the wick remains as centred as possible.
6) Off the heat, wait 1 minute for the wax to cool down a bit and add the perfume
7) Pouring and installing the wick holders
Pour the wax into the moulds and attach the wick holders to the wicks.
8) Drying, 2nd pour and 3rd pour
The wax always shrinks. It always does. It is inevitable.
Paraffin wax shrinks a lot, vegetable waxes much less.
You must therefore plan your total weight of wax according to this characteristic: you will have to make several pours!
Wait 30 minutes, then melt your wax again (or your remaining wax). Be careful with the proportions of the colouring agents if you are preparing a new mixture, because when it dries, there will be two different shades...
Once the wax is liquid, remove it from the heat and wait a few minutes before pouring.
The hotter the wax is when you pour it, the greater the shrinkage phenomenon.
But... the hotter the wax is during pouring, the shinier the candle will be!
That's why my first pour is always done when the wax is hot, so there is a lot of shrinkage, and then for the second and third pours, I wait for the wax to cool down significantly.
9) Remove and cut the wicks
*Be aware of the final direction of the candle*.
Your candle is ready to be burned! But, you have the choice to decorate it! Take inspiration from the ideas below
10) FINAL DECORATION
The technique of photo transfer on candle
This technique will allow you to put runes, seals, photos of our Gods, in short to personalise your candle to the maximum, it will be UNIQUE!
You will need :
tissue paper
1 A4 sheet of thick paper
A printer
A hair dryer
Heat resistant gloves
1 - Tape the tissue paper to the A4 sheet of thick cardboard
2 - Print your images on it
3 -
Cut out the patterns
Place on the candle, put on heat resistant gloves and turn on your hair dryer to maximum power.
The tissue paper will then melt into the wax!
And there you have your CANDLE!
Beware of unsightly wax drips, which are inevitable, due to the heat of the hair dryer...
Using a Liquid Wax Pen
Using a glitter varnish
This is a special candle varnish, to be applied with a brush.
You can add gold, blue, etc. pigments
Jewel" for candle
I made them myself from earring holders!
They are Trees of Life :)
In conclusion: Don't be obsessed with the gram, the millimeter, the position of the wick, do your best! And above all take pleasure in creating with your hands for our Gods! And then be proud to light your own candles on your altar!
This tutorial is only for "moulded" candles. If you wish, I could also give explanations on the candles called "poured": that is to say candles poured in a pot with fatty and flexible vegetable wax: soya wax, colza wax, sunflower wax.
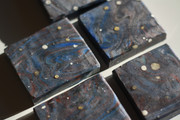
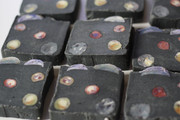
Examples of "poured candles" that I make:
Tealights can be made as "moulded" or "cast" candles: ASK ME FOR A SPECIFIC TUTO if you wish.
I would love to see your work on this thread if you decide to make your own candles!
I'm still available to help you if you have any difficulties.

 Honorary Translator
 External ↗
 External ↗
 External ↗
 External ↗
 Active Helper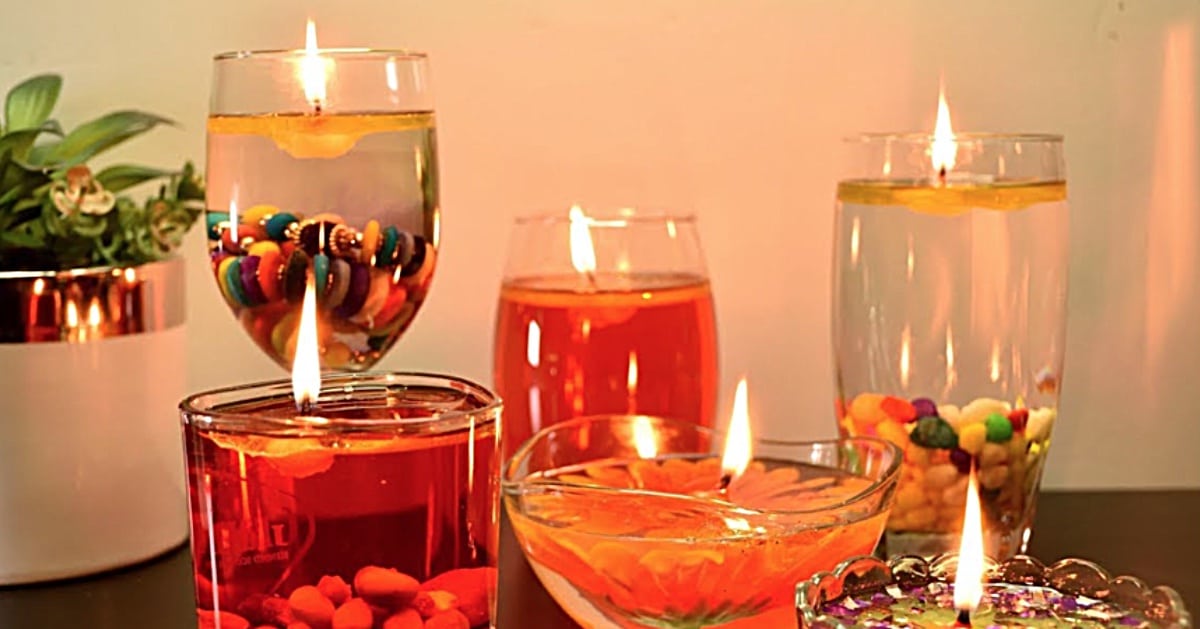
 External ↗
 External ↗
 External ↗
 External ↗
 External ↗
 External ↗
 External ↗
 External ↗
 External ↗
 External ↗
 External ↗
 External ↗
 External ↗
 External ↗
 External ↗